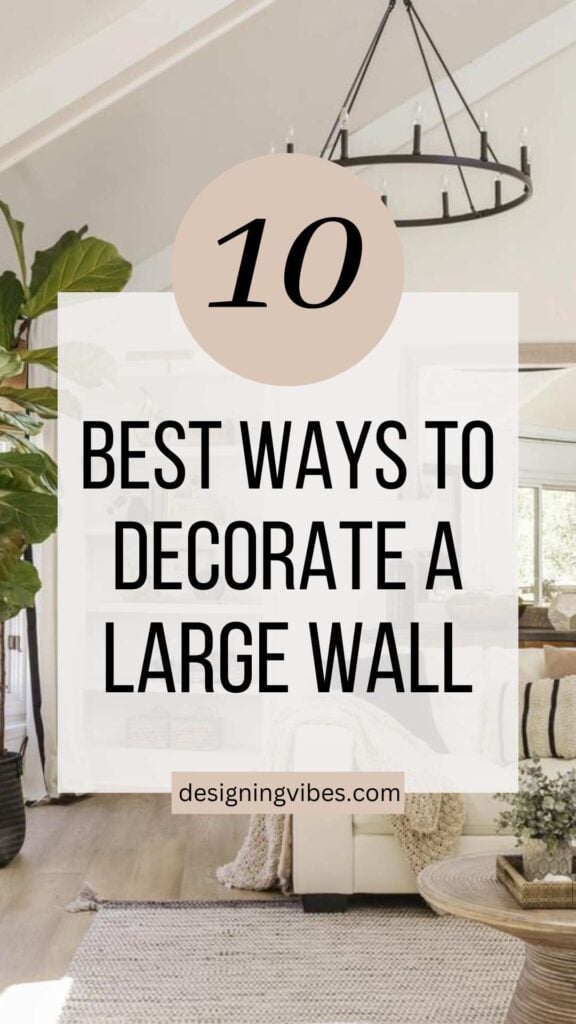
05 Mar How to decorate a large wall in living room with easy ideas
A massive empty wall in your living room offers a unique challenge and an incredible chance for personal expression. This guide provides practical decor ideas to turn that blank canvas into a stunning focal point using fine art and smart lighting. Whether you’re drawn to a single oversized artwork or a carefully arranged gallery, you’ll learn how to decorate a large wall with confidence. We’ll show you techniques for styling your wall space so it reflects your personality and makes a powerful visual statement.
Transform your space with large-scale artwork
The most straightforward way to decorate a large wall is by choosing a commanding piece of art that serves as the room’s anchor. A large piece of art instantly adds sophistication and is perfect for spaces with high ceilings or open floor plans. Aluminum photo prints are a remarkably versatile choice for this, offering a lightweight build and impressive durability. Their minimal weight makes them easy to mount on virtually any wall space without the need for heavy-duty reinforcement or professional installation.
Selecting the right size and finish for impact
Learning how to decorate a blank wall starts with picking the right dimensions for your specific room. For a wall over 12 feet wide, aim for artwork that’s at least 48 inches wide to keep the proportions harmonious. A good rule of thumb is to choose wall decor that covers about one-third of the wall height for a balanced look. With custom aluminum prints available in sizes up to 150 × 100 cm, you can order the perfect dimensions to complement your furniture.
- Glossy finish: Delivers vibrant, intense colors—ideal for automotive photography—while the white Dibond undercoat makes hues pop.
- Brushed aluminum finish: Offers a subtle metallic texture that works beautifully with modern decor ideas; it cuts down on glare while adding a touch of refined depth.
- Matte finish: Completely eliminates reflections, making it the best option for brightly lit rooms or images with intricate details.
The white undercoat on Dibond aluminum panels boosts color intensity far more than traditional canvas or paint. This superior quality makes the investment worthwhile, ensuring your oversized artwork retains a gallery-worthy appearance for years. Always preview your image in high resolution before printing to confirm that fine details will be accurately reproduced.
Mounting and positioning techniques for focal pieces
For a professional look, hang your artwork at eye level, approximately 57 to 60 inches from the floor. This height ensures comfortable viewing whether you’re standing or seated, making it easy to engage with your piece of art. The floating-mount kit included with aluminum prints allows for quick, tool-free installation and uses hidden brackets for a secure hold. Try out different wall decor ideas by testing placements with painter’s tape before making any holes.
Because these prints are so lightweight, you can reposition them easily without leaving lasting damage to the wall—perfect for seasonal updates. Use D-ring hangers for simple adjustments to keep your focal point perfectly aligned with the room. For an exceptionally large wall over 16 feet high, consider hanging the artwork a bit higher to maintain a comfortable viewing angle.
Pairing artwork with furniture and lighting
A large piece of art becomes even more striking when paired with complementary furniture placed beneath it. Try positioning a low console table or a slim bench directly below your main artwork to help ground the display. Add decorative objects like vases or items from your shelving on this surface to break up the empty wall and create visual layers. This approach turns a plain blank wall into a complete, attention-grabbing vignette.
Lighting plays a crucial role in highlighting your artwork and creating a gallery-like atmosphere in your living room. Install adjustable spotlights above your focal piece, or use discreet LED strips for soft backlighting. Choose a warm color temperature for vintage scenes and a cooler tone for sharp landscape photography. Position the lights to minimize glare while adding depth, making the artwork appear to project from the wall.
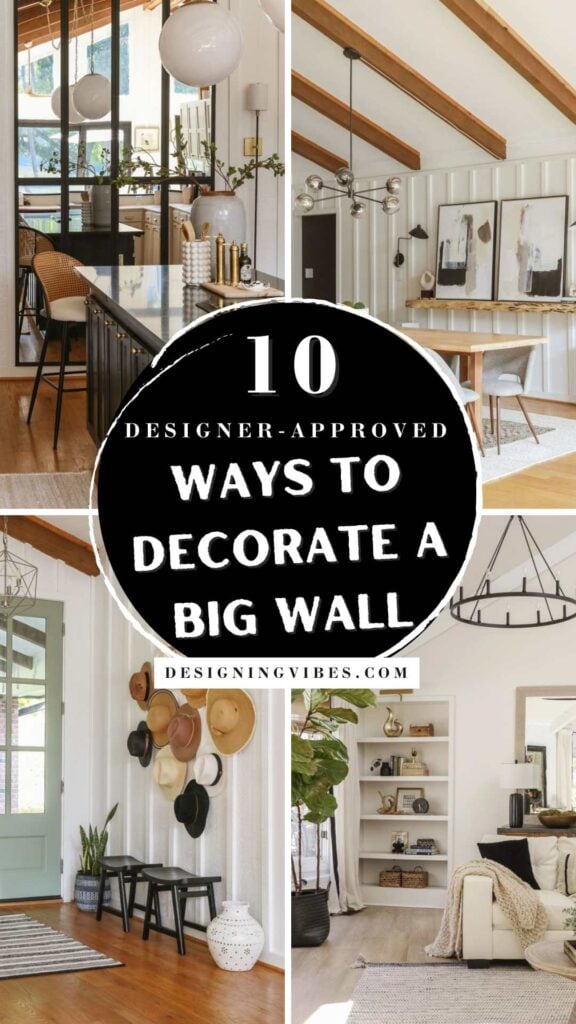
Create a gallery wall with coordinated prints
If you’re looking to add visual depth and personal flair to your space, a gallery wall provides a sophisticated alternative to a single large artwork. This approach blends multiple prints of varying sizes and orientations while keeping a unified color scheme. A well-designed gallery wall balances visual interest with breathing room, using aluminum wall art to showcase your favorite automotive or landscape photographs. It’s an excellent way to decorate a blank white wall in any home, whether it’s a modern loft or a rustic farmhouse.
Planning layout and spacing for visual balance
Begin by selecting a central anchor piece—typically your most striking photograph—then build the arrangement around it. This foundational step makes it easier to decorate a blank white wall by creating a natural visual path. We suggest using paper templates or painter’s tape to test your layout on the wall before making any holes. This simple try-before-you-commit approach costs nothing but helps you avoid costly, permanent errors.
Maintain a consistent gap of around 5 to 6 centimeters between frames to prevent a crowded look while keeping the display cohesive. Spacing is just as important as the art itself; too much distance feels disjointed, while too little appears chaotic. For comfortable viewing in your living room, aim to position the center of the entire gallery wall roughly 57 to 60 inches from the floor.
| Gallery Wall Configuration | Ideal Wall Width | Piece Count | Recommended Layout |
| Compact grouping | 6-8 feet | 3 pieces | Triangular or L-shaped arrangement |
| Standard gallery | 8-12 feet | 4-5 pieces | Grid or salon style with central anchor |
| Extended gallery | 12-16 feet | 6-8 pieces | Multi-row composition with balanced distribution |
| Feature wall | 16+ feet | 8-12 pieces | Complex salon arrangement with mixed orientations |
Mixing sizes and finishes for dynamic displays
Using a mix of sizes introduces rhythm and prevents your living room wall from appearing flat or repetitive. Try combining a large 120 × 80 centimeter print with smaller 60 × 40 and 30 × 20 centimeter pieces to establish a pleasing visual hierarchy. Blending aluminum finishes like glossy, satin, and brushed adds textural variety while maintaining a cohesive color story. Consider arranging a triptych of related car models or landscapes to narrate a visual tale through your wall art.
- Central anchor piece: Pick your largest and most dramatic print in a glossy finish to draw the eye and anchor the entire composition.
- Supporting side pieces: Position medium-sized prints (60 × 40 cm) in brushed aluminum along the sides to frame your main artwork.
- Accent prints: Use small 30 × 20 cm matte photos to fill in gaps and bring detail to the negative space.
- Cohesive finish mix: Combine different aluminum finishes within your gallery to add depth, relying on a consistent white base for color harmony.
Lightweight aluminum prints allow you to rearrange your layout whenever you crave a new look. This adaptability makes gallery walls ideal for those who enjoy updating their interior décor with the seasons. Keyhole mounts help distribute weight safely and permit small adjustments without harming your wall’s paint or drywall. Always preview your final arrangement using digital tools before committing to hanging anything on your large wall.
Choose a deliberate mix of complementary sizes rather than identical dimensions—variation sparks interest, while uniformity can look random. You might align the bottom edges or create diagonal sightlines that guide the eye in engaging ways. Keeping a consistent 5-centimeter gap acts as a unifying element that connects different images while honoring each one’s individual presence.
Adding shelves and lighting to enhance depth
Incorporating shelving into or beneath your gallery introduces layered depth, moving beyond two-dimensional images. Install shelves at varying heights, leaving 12 to 18 inches of vertical space between them to maintain an airy feel. Slim shelves work best to minimize dust collection and preserve a clean look that complements fine art photography. These ledges are perfect for displaying automotive wall art ideas alongside small sculptures or books.
Position shelves below your main art cluster or woven between pieces to visually break up a large wall. Layer objects of different heights—like tall vases beside low sculptures—to incorporate organic texture. Be sure to leave ample negative space around each item to prevent a cluttered appearance.
Use adjustable track lighting or wall spotlights set at a 30 to 45 degree angle to cast even light across your artwork. This technique accentuates the texture of large art and creates a professional gallery ambiance. Adding LED strips behind shelves offers a soft glow that beautifully highlights your displayed items. Match the color temperature to warm or cool tones to suit the atmosphere of your living room.
Enhance living room wall decor with layers
Mastering the art of thoughtful layering can transform a plain, empty wall into a rich and textured exhibition of your unique personality. Combining artwork, mirrors, shelving, and textiles creates a depth and visual intrigue that a single piece can’t match. This multidimensional approach is the key to sophisticated styling, whether you’re figuring out how to decorate a large wall in a bedroom or your main living room. It works beautifully across all design styles, from modern minimalism to more eclectic, collected looks.
Strategic home accessories—like artwork, mirrors, shelves, and textiles—can completely transform a large living room wall. They introduce color, texture, and captivating visual interest, creating powerful focal points and even improving the perception of space. When you arrange these pieces in deliberate layers and incorporate functional decor such as storage boxes or accent lighting, you add depth and a strong sense of personal expression. For specific wall decor ideas, start by considering how these different elements interact with one another.
Using accent walls and mirrors strategically
The color of a wall dramatically influences how we perceive both the space and the art displayed on it, making your choice of an accent wall absolutely crucial. For a bold statement, you can paint a single wall in a deep, saturated color like teal or charcoal gray. Alternatively, consider using peel-and-stick wallpaper featuring geometric or botanical patterns to add visual interest without a permanent commitment. This prepared backdrop makes your artwork stand out and helps to clearly define the room’s overall aesthetic.
When selecting your paint colors, aim for hues that complement the dominant palette of your primary artwork. This ensures that the wall and your prints work together in harmony instead of competing for attention. A well-chosen accent wall acts as the perfect foundational canvas to effectively decorate a large wall.
- Bold solid colors: Choose rich jewel tones or earthy shades to create a dramatic backdrop that makes your wall art appear more vivid and striking.
- Peel-and-stick wallpaper: Apply patterns like abstract designs or florals to add texture and interest, a perfect solution for renters or those seeking a non-permanent option.
- Large decorative mirror: Position it opposite a window to amplify natural light and create the delightful illusion of a more spacious room.
- Wainscoting or shiplap: Installing wood paneling on the lower section of the wall adds architectural texture that wonderfully complements fine art photography.
Mirrors serve a dual purpose: they are both functional and highly decorative. They multiply light and add a touch of sophistication to any wall decor composition. Select frames that align with your existing style—think sleek metal for modern rooms or natural, rustic wood for a farmhouse aesthetic. For the best effect, hang mirrors at eye level, typically 57 to 60 inches from the floor, to naturally draw viewers into the space. Placing a large mirror behind a console table can also beautifully reflect displayed objects and amplify the room’s ambient light.
Integrating functional furniture and shelving
Thoughtfully placing furniture creates essential anchor points that visually organize your living room wall while providing practical functionality. A narrow console table positioned beneath a piece of artwork offers a perfect surface for lamps and rotating seasonal displays. This type of arrangement helps distribute visual weight evenly, grounding the composition so the wall space feels balanced, not top-heavy. It turns an empty wall into a useful, intentionally styled area.
Installing floating shelving at varying heights provides excellent storage for books and plants that can echo the themes of your artwork. This integration transforms a blank surface into a multifunctional display that serves both decorative and utilitarian purposes. It’s a particularly smart solution for when you need to decorate a large wall with both style and substance.
- Floating shelves: Install these 12-18 inches apart to display books and small sculptures that complement your artwork.
- Narrow console tables: Place these under your main artwork to build layered vignettes with lamps and decorative objects.
- Tall armoires or bookcases: Use vertical furniture pieces to fill wall space, offering storage while establishing a clear focal point.
- Wall-mounted cabinets: Mount slim storage units near artwork to add function and visually break up large expanses of wall.
Styling your shelves requires a careful balance between curated objects and open, negative space to avoid a cluttered feel. Combine books, decor items, and plants at various heights to create a compelling visual rhythm that guides the eye across the display. Incorporate both vertical elements (like tall vases) and horizontal ones (like stacks of books) to maintain visual interest. Layering different textures—such as smooth ceramic vessels next to woven baskets—creates rich, detailed compositions that are a delight to look at up close.
Frequently Asked Questions
How do I calculate the right size for a piece of art on a large wall?
Aim for your piece of art to cover approximately one-third of the wall’s total height to prevent it from looking out of place. For a large wall over 12 feet wide, selecting artwork that is at least 48 inches long works well. To find the perfect size, measure your wall and divide the height by three.
A print sized 120 × 80 centimeters looks beautiful on walls between 8 and 12 feet wide. For even larger spaces, pieces around 150 × 100 centimeters are more suitable. Before purchasing any wall art, try marking the intended area with painter’s tape to see how it fits and balances with the room.
What’s the best spacing for a gallery wall arrangement?
For a polished gallery wall, maintain a consistent gap of 5 to 6 centimeters between each piece. This steady spacing acts as a visual guide that ties different images together into one harmonious display. It makes the arrangement look tidy and connected without feeling too crowded.
The center of your entire gallery should be positioned about 57 to 60 inches from the floor for easy viewing. You can test the layout with paper templates or tape before drilling or painting. Proper spacing lets each artwork stand out while still contributing to the overall composition.
What lighting setup works best for wall art displays?
Use adjustable LED spotlights set at a 30- to 45-degree angle to emphasize texture and reduce glare. Adding narrow light strips behind floating shelves can also produce an elegant backlit glow. This kind of lighting highlights the details and finish of your wall art beautifully.
Opt for warm lighting for vintage pieces and cooler tones for landscapes—feel free to adjust with the seasons. Place lights above eye level to prevent glare and create engaging shadows. Mixing focused spotlights with softer background light will make your piece of art truly stand out.
Sorry, the comment form is closed at this time.