05 May Photo wall layout ideas to inspire your perfect gallery wall
You can easily turn a large white wall into a personal art gallery that reflects your taste. This guide offers practical arrangement ideas to enhance your living room, bedroom, or hallway. You’ll learn exactly how to position each piece and master the spacing for a striking result.
Popular gallery wall layout styles for every room
The right gallery wall layout choice sets the mood for the entire room. Each style offers a distinct visual experience, suited to different spaces and sensibilities. Your ideal wall layout depends on the available surface area and your preference for structure or creative freedom.
Grid, salon, and triptych layouts explained
The structured grid uses identical, aligned frames for a neat appearance. This approach to photo wall arrangement ideas is perfect if you’re looking for clean lines without fuss. Its uniform rhythm lets each art print breathe while guaranteeing perfect visual cohesion.
- Grid layout: all frames are the same size with regular spacing, ideal for a formal look in a bedroom.
- Salon-style layout: the mix of sizes and finishes creates an eclectic look perfect for varied subjects.
- Triptych arrangement: a single panoramic photo spread across three identical panels forms a very dramatic focal point.
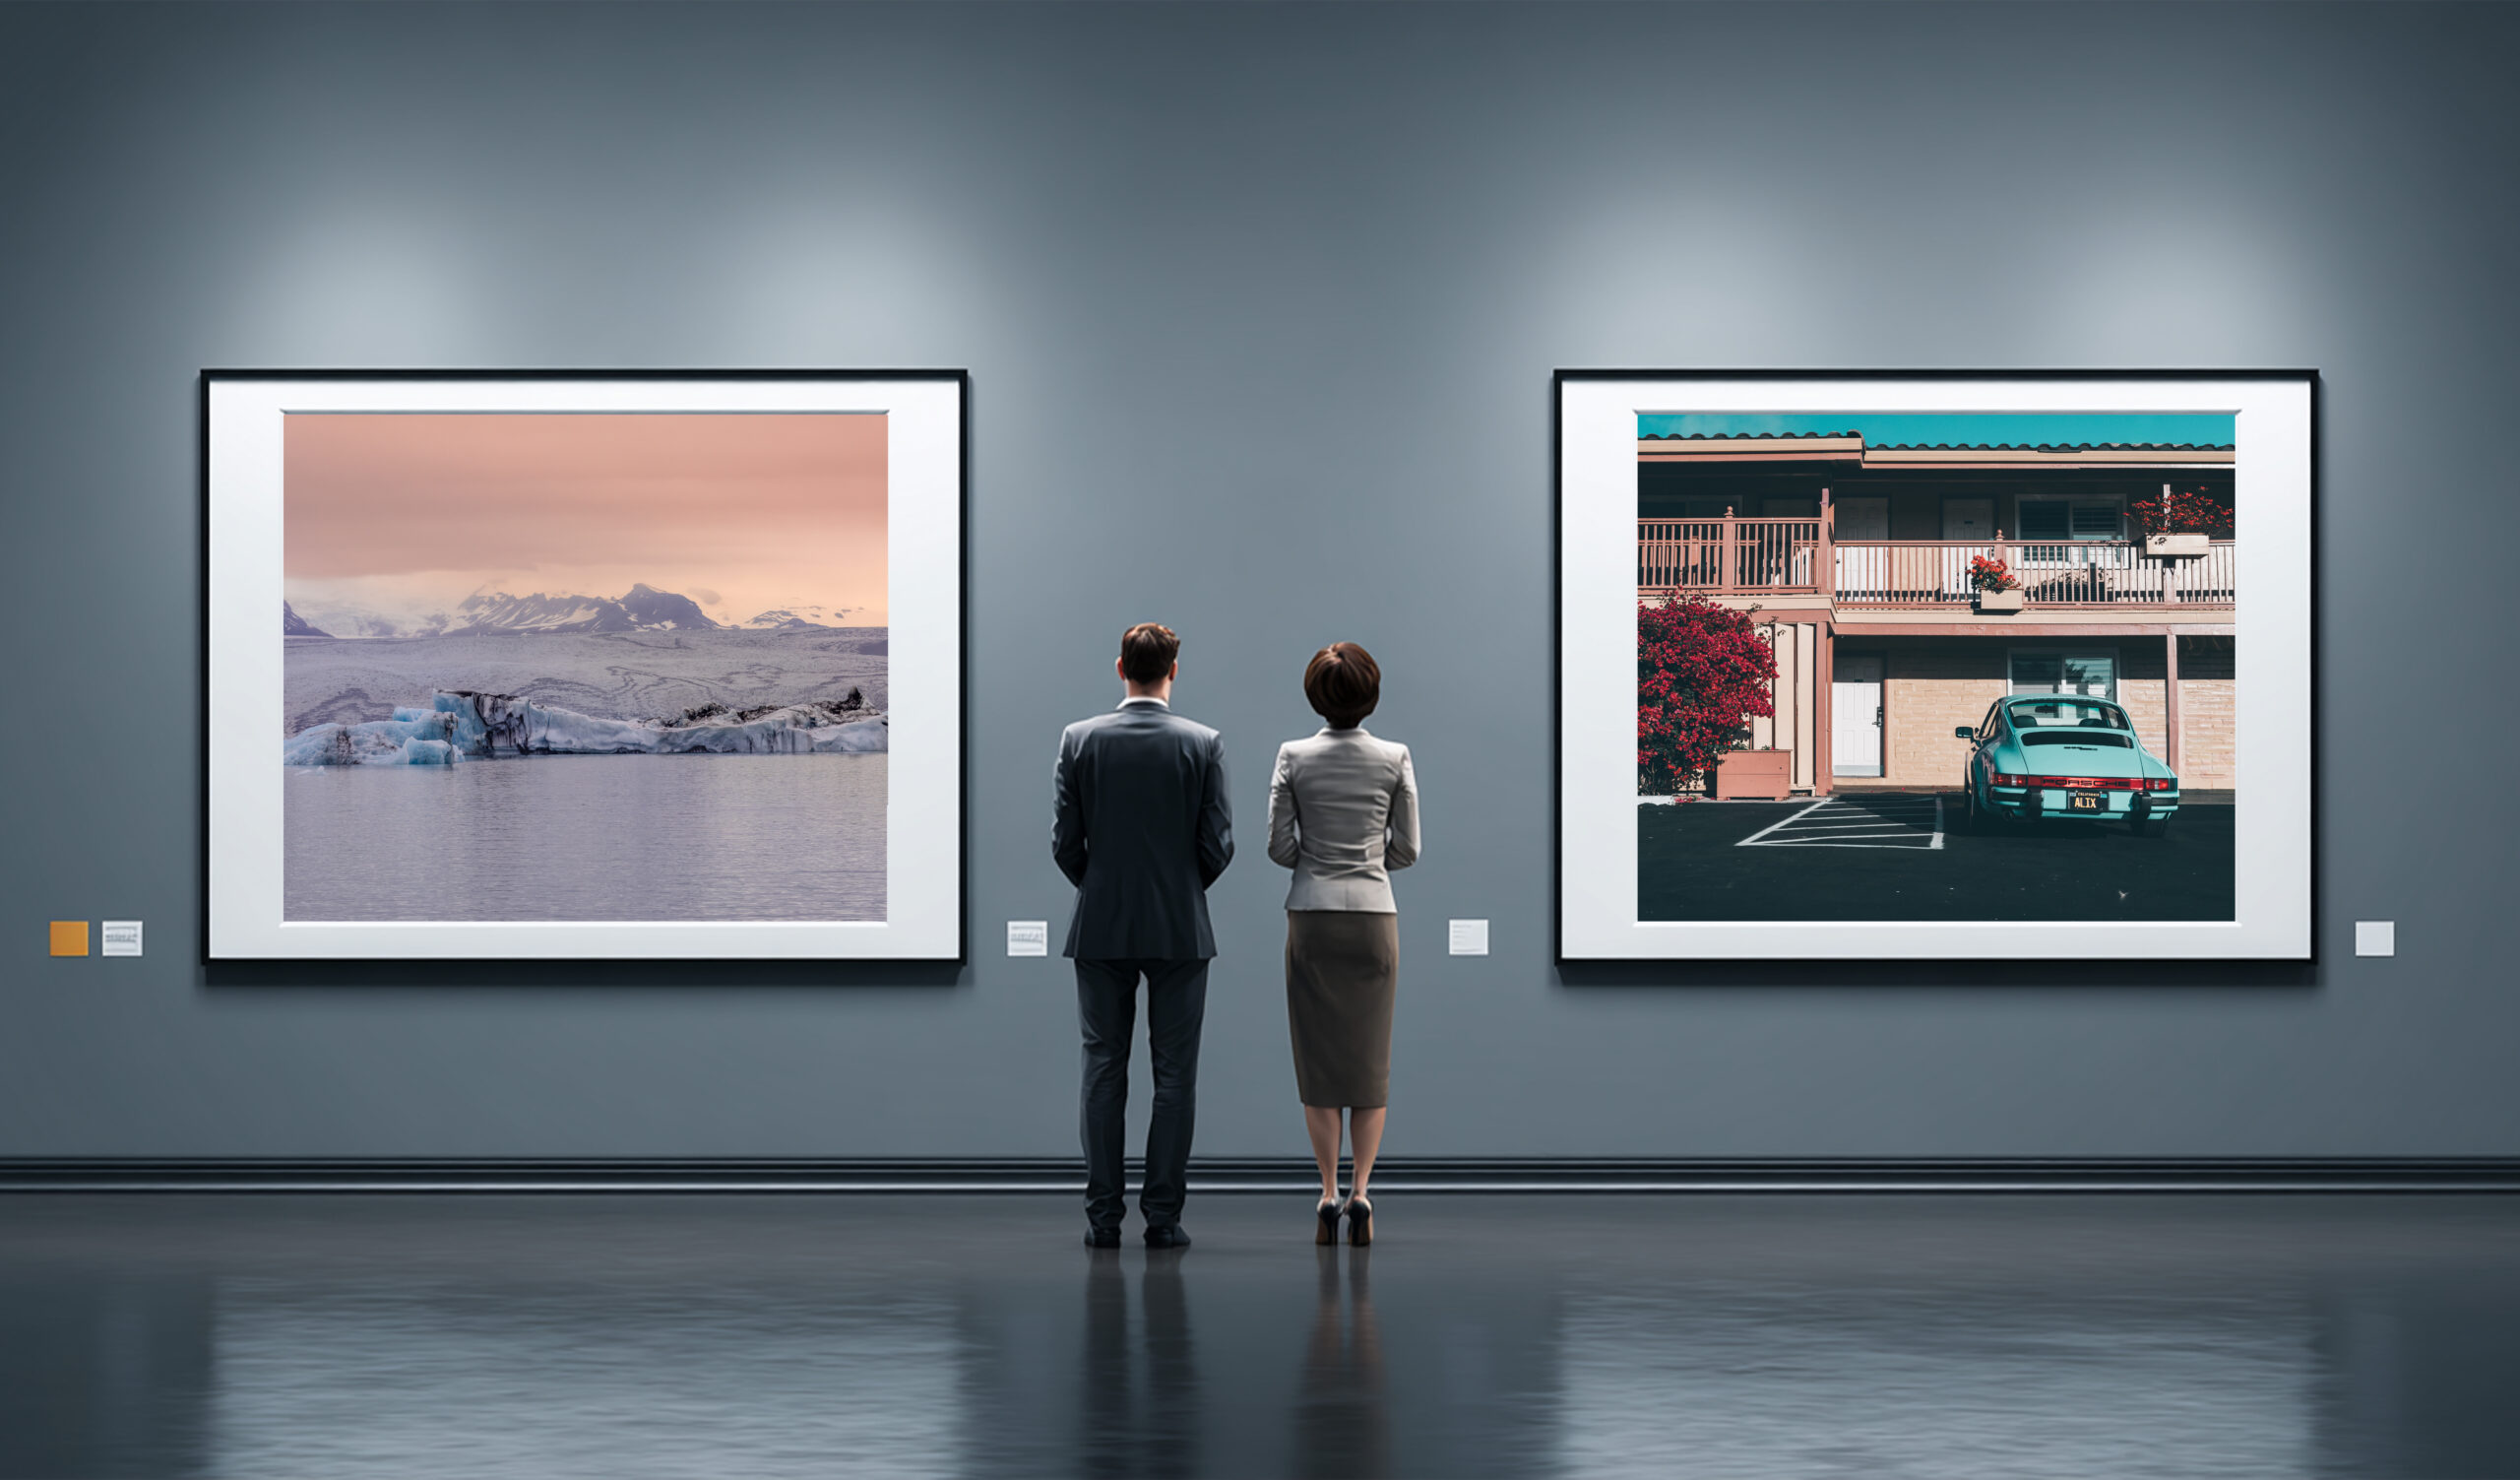
Salon-style arrangements embrace variety by combining colors, materials, and types of artwork without rigid symmetry. This lively approach is perfect for a personal collection mixing family memories and art. You can thus showcase travel landscapes next to unique sculptural pieces.
Asymmetrical and triangular cluster arrangements
Asymmetrical designs offer maximum creative freedom and require less planning than a classic grid. Positioning a large central piece slightly off-center naturally draws the eye into the room. Surrounding it with varied pieces is an excellent path for gallery wall template ideas that favor personality over formality.
A triangular cluster groups three artworks tightly around a large central photo, creating a striking composition. This configuration is ideal for narrow hallways and is great inspiration for new wall layout ideas. Start with a flagship image, then place two complementary pieces nearby.
How to mix frames and materials for visual depth
Combining different frame styles—black, white, natural wood—instantly adds warmth and sophistication. Using up to three complementary finishes creates a beautiful visual rhythm for the whole. Each framed piece will actively contribute to an intentional and carefully composed appearance.
Mixing horizontal and vertical orientations in the same arrangement generates dynamic visual interest. Positioning small vertical prints near a wide central piece is a good template to follow for balance. This simple variation in direction naturally guides the eye through your beautiful photo wall.
How to plan and design your photo wall layout
Before drilling a single hole, sketch your composition on the floor using masking tape. This simple test allows you to quickly detect spacing issues and size imbalances. A little planning prevents mistakes and guarantees a finished, well-thought-out photo wall layout design.
Step-by-step planning before you hang anything
Start by measuring your wall and mark out a rectangle of the same dimensions on the floor. Arrange all your pieces inside this space to check for balance and flow. This manual method allows you to adjust your gallery wall layout without making irreversible mistakes.
Take a photo of your mock-up, then use a paper template cut to the dimensions of each frame. Fix each template to the wall and mark the nail locations directly on the paper. Alternatively, use masking tape to trace the outline of each frame for a clear preview of your future gallery wall.
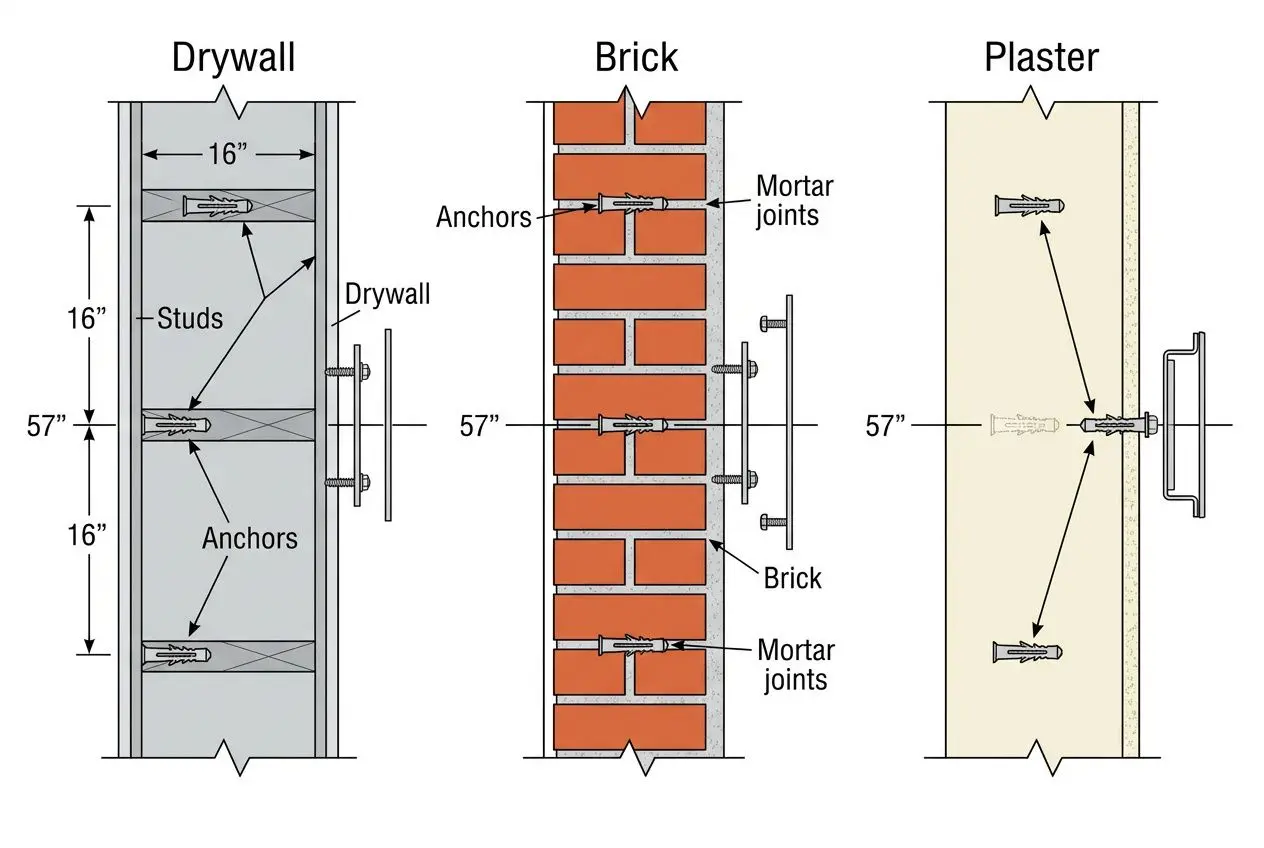
Sizing, spacing, and eye-level placement rules
The center of your composition should be at eye level, approximately 57 to 60 inches from the floor. For very tall rooms, hang your focal piece a bit higher for better overall balance. As a general rule, your wall layout should extend across about two-thirds the width of the furniture beneath it.
Maintain a regular spacing of 2 inches between each piece for your family photo wall layout ideas. Irregular gaps disrupt the visual flow and give the whole arrangement a messy look. Hang the bottom edge about 6 to 8 inches above your furniture for a connected and airy feel.
| Wall Width | Recommended Layout | Number of Frames | Ideal For |
| 6–8 feet | Triangular Grouping | 3 pieces | Narrow hallways, small spaces |
| 8–12 feet | Grid or Asymmetrical | 4–5 frames | Above sofas, bedrooms |
| 12–16 feet | Extended Grid or Salon Style | 6–8 frames | Large living room or bedroom walls |
| 16+ feet | Gallery Element with Mixed Pieces | 8–12 frames | Statement walls, vast spaces |
Room-by-room gallery wall layout recommendations
Living rooms work perfectly with wide arrangements, like grids or horizontal lines placed above the sofa. The sofa anchors the relaxation area, providing an ideal natural base. This makes the space above it the perfect spot for a stunning photo wall.
Bedrooms call for calmer designs, like vertical stacks or soft asymmetrical clusters. These wall layout ideas fit perfectly above the bed without overwhelming the cozy room. For hallways, mix different sizes to display personal memories without rigidity.
- Living Room: Opt for a composition 5 to 6 feet wide above the sofa, mixing different art styles.
- Bedroom: Hang a vertical group of matching frames, centered above the bed at eye level.
- Hallway: Create an asymmetrical arrangement to naturally guide guests through the narrow space.
- Entryway: Welcome visitors with a balanced collection of striking, impactful images near the door.
Never forget to measure your furniture and walls before buying prints or new frames. This ensures your final presentation fits perfectly into the room instead of seeming out of place. Following a good guide of gallery wall layout ideas helps match the artwork dimensions to your space effortlessly.
Gallery Wall Tools, Finishes, and Final Styling Tips
Selecting the right tools can elevate a simple gallery wall into a museum-quality display. Proper spacing, premium finishes, and strategic lighting anchor your entire room effectively. Every material choice also affects how natural light plays off your images.
Paper Templates and Tape as Layout Planning Tools
Using a paper template—cut to your exact frame dimensions—is one of the most reliable photo wall arrangement ideas. It lets you test a wall layout with no commitment. This hands-on method helps you visualize spacing and proportion perfectly in your own space.
- Paper Template Method: Cut templates to match each frame, tape them up, and mark the nail holes. Offers maximum accuracy with no wall damage.
- Painter’s Tape Outline: Use low-adhesive tape to sketch frame boundaries. Adjust spacing or the entire gallery wall layout before you drill.
- Floor Layout with Photography: Arrange everything on the floor, snap a photo, then measure carefully to replicate the setup on your wall.
Outlining each frame with tape gives a realistic preview of your gallery wall. This simple step prevents mistakes and helps check visual flow. A gallery wall layout becomes far easier when you see the results first.
Choosing Print Materials and Finishes for Impact
Premium materials turn standard images into stunning statements. A gallery wall template generator online might suggest uniformity, but mixing finishes on a photo wall often delivers a more compelling result.
Matte Aluminum Dibond reduces reflections while keeping colors vibrant from every angle. Acrylic glass adds striking depth, pulling viewers right into the artwork. A consistent white undercoating across mixed pieces ensures visual harmony.
- Direct Aluminum Print: A vibrant finish that suits automotive photography beautifully. Available in glossy, brushed, or matte.
- Matte Canvas: Offers a soft, classic look that adds warmth. Ideal for nature and landscapes—minimizes reflections nicely.
- Acrylic Glass or Fuji Crystal: Adds dimensional depth and light-reflecting brilliance. Perfect for a bold focal piece.
Available sizes let you combine pieces seamlessly within your gallery wall. Large prints anchor the whole composition, while smaller frames create breathing room around your main piece.
Lighting and Shelving to Complete Your Gallery Wall
Strategic lighting turns your gallery wall into a stunning evening focal point. Angled LED spotlights highlight texture and reduce glare on glossy finishes. This kind of lighting adds dimension, transforming flat images into sculptural statements.
Floating shelves introduce visual breaks while keeping the arrangement light and uncluttered. Lightweight prints from Ferrari wall photo selections make repositioning effortless. Update your display anytime fresh inspiration strikes.
Frequently Asked Questions
What’s the best way to create a gallery wall without professional help?
To easily set up a gallery wall, cut a paper template to the dimensions of each frame. Stick these templates to the wall, mark your fixing points precisely, then remove the paper. Photograph your layout on the floor beforehand; this helps you arrange each element perfectly before hanging them.
How far apart should frames be in a gallery wall?
Maintain a consistent gap of five centimeters between pieces when you decide to create a gallery. Irregular spacing harms the harmony of your gallery wall, even if your artworks are beautifully framed. A simple ruler or guide ensures a neat and consistent installation.
What size prints work best for a large living room wall?
For a large wall, opt for prints at least 120 cm wide to maintain an ideal proportion. Anchor the display with one or two pieces of this size, then surround them with medium and small formats. This approach creates a clear visual rhythm without overwhelming the space.
Sorry, the comment form is closed at this time.