26 Apr What is the golden hour for photos and why it matters
Golden hour is one of nature’s most remarkable gifts to photographers, happening briefly each day around sunrise and sunset. This guide explores what makes this time of day so extraordinary for capturing images. Mastering photography lighting and timing will dramatically enhance your photos with beautifully soft illumination.
What is Golden Hour and How Does the Light Work?
Often referred to as magic hour by professionals, the golden hour typically spans the hour after sunrise and the hour before sunset. Its exact length can vary widely depending on your location, weather patterns, and the time of year.
The absolute peak of golden hour light might only last for about fifteen precious minutes. This is the moment when rich color saturation reaches its maximum intensity. Recognizing this brief period is key to organizing more effective photo shoots.
Why the Sun’s Angle Transforms Photography Lighting and Timing
When the sun hangs low near the horizon, its rays travel a longer path through the atmosphere. This extended journey filters the sunlight, producing those signature warm, radiant tones. It creates a beautifully soft light, a stark contrast to the harsh midday sun.
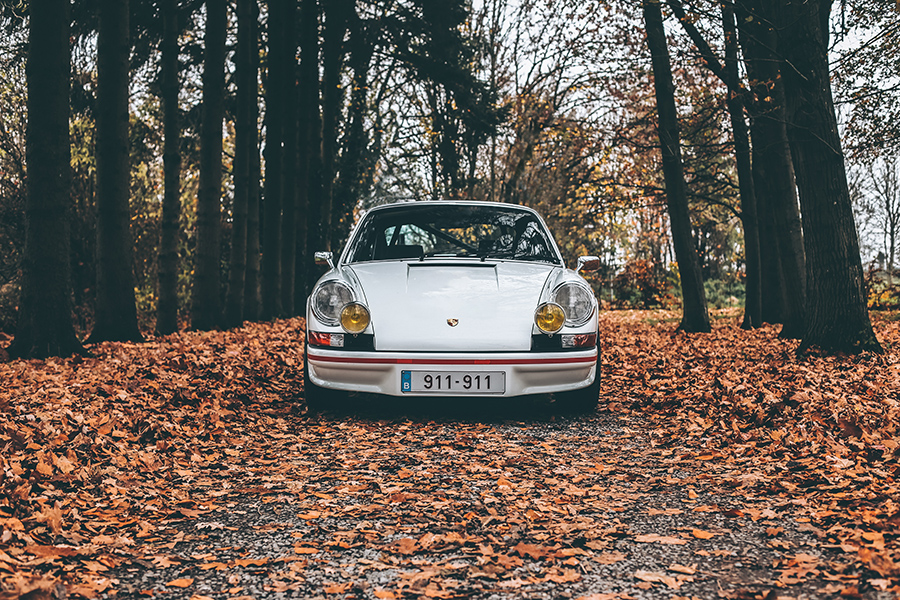
This lighting transformation completely changes how your subjects appear on camera. For example, stunning golden hour lighting accentuates the iconic lines of a classic car, while perfectly illuminating surrounding autumn foliage.
- Light wavelength scattering: Shorter blue wavelengths scatter more than the longer red ones, creating the warm tones that define golden hour in photography.
- Reduced contrast and shadows: Increased indirect light from the sky produces gentle, low-contrast illumination. Shadows grow longer and become pleasingly soft rather than harsh.
- Dynamic range optimization: The overall dynamic range decreases significantly during this period, preventing the deep shadows and overexposed highlights typical of noon.
This flattering light is exceptionally kind to all skin tones in portrait photography. A beautiful warm glow adds a nostalgic, youthful, and joyful energy to any scene, creating a deep emotional connection with viewers.
Why Midday Is the Worst Time of Day to Take Pictures
Harsh lighting conditions often make noon the worst time of day to take pictures. When the midday sun is directly overhead, it creates intense contrast and unflattering shadows. The harsh direct light is particularly unforgiving for portraits and delicate subjects.
This intense brightness also poses major challenges for outdoor automotive photography, washing out subtle paint details and overwhelming reflective surfaces. Without proper lighting control, photographers struggle to achieve decent results.
By contrast, golden hour gracefully minimizes facial shadows and balances skin tones. Professionals often design their shooting schedules around the sun’s natural cycle, ensuring superior results without battling harsh daylight.
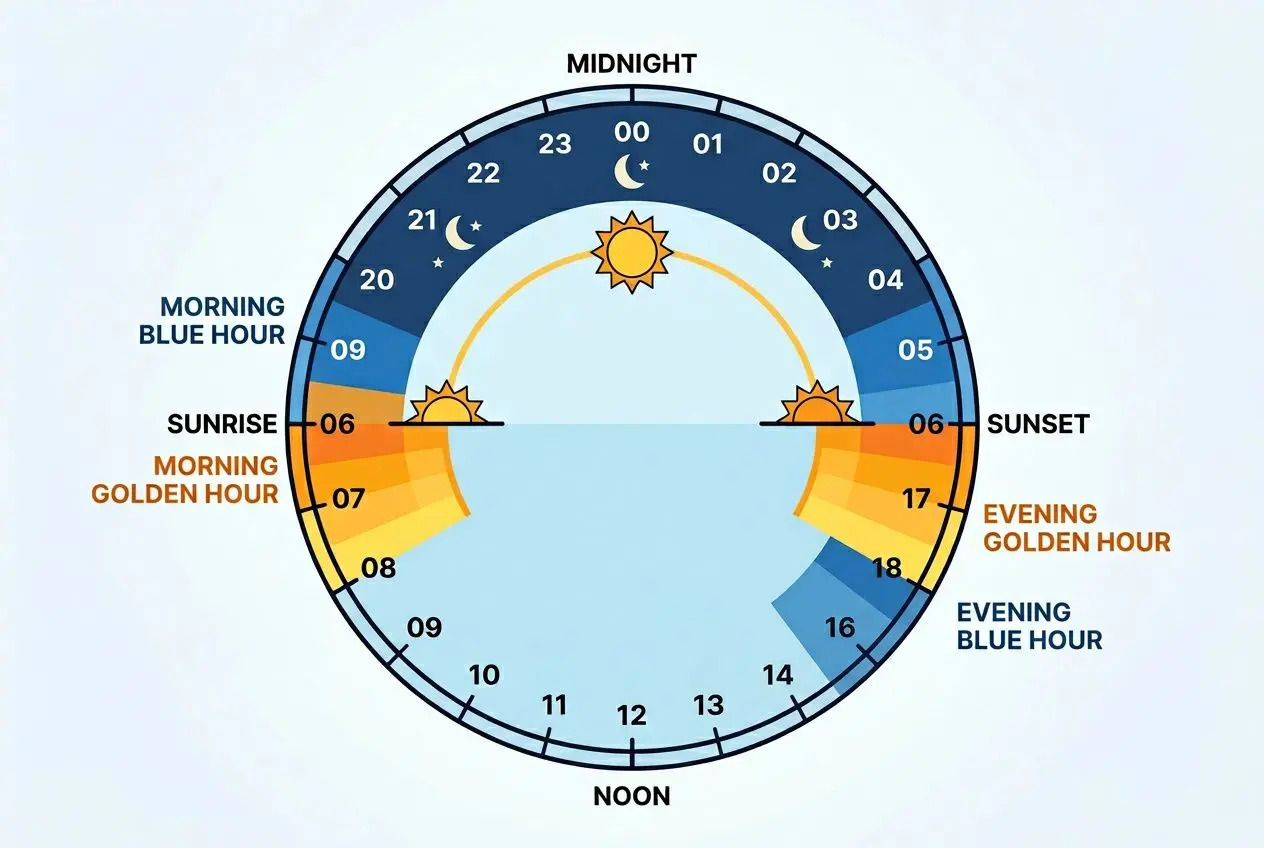
How Golden Hour Differs from Blue Hour
Blue hour occurs just before sunrise or immediately after sunset, offering a cool, moody atmosphere rather than warm, sunny tones. You’ll notice a dramatic shift toward deep purples and blues during this period.
Both times provide lovely low-contrast conditions, but they evoke different feelings: warmth brings intimacy, while cool tones inspire calm. Capturing the perfect golden hour car photo depends on precise timing to catch that warm light.
When does golden hour happen and how long does it last?
Cars & Roses — Fine Art Photography
Golden Hour Photography — Fine Art Prints
The magic of golden hour, captured and printed to perfection. Museum-quality archival prints from €78.
The precise timing of golden hour depends on your location, the season, and the local weather. Since this beautiful period of warm color shifts throughout the year, photographers should plan ahead to capture golden hour light at its best. Using a dedicated app is the most effective way to track this fleeting moment and ensure you don’t miss it.
Is 4pm a good time to take photos depending on the season?
Many people ask, “Is 4pm a good time to take photos?” The answer isn’t simple—it varies greatly with your latitude and the season. During winter, the sun stays lower in the sky, often making 4pm an excellent time for photography. In summer, however, the sunlight at 4pm is usually harsh, pushing the ideal golden hour time much closer to sunset.
- Summer conditions: In mid-latitude summers, 4pm light is typically too harsh for the warm, golden light photographers love—wait until later in the evening.
- Winter advantages: With the sun lower on the horizon in winter, 4pm often delivers beautiful, soft light—perfect for capturing golden hour lighting.
- Equatorial differences: Near the equator, the transition to sunset is very short—the golden hour period is brief and demands precise timing every day.
Planning with smartphone apps removes all the uncertainty from scheduling your shoot. These tools deliver highly accurate local information for your exact date and location, helping you make the most of that magical time for photos before sunset.
| Season/Latitude | Optimal shooting time | Duration | 4pm lighting quality |
| Summer, high latitude | 8pm-9pm | 1-2+ hours | Still too bright |
| Summer, mid-latitude | 7pm-8pm | 45-60 minutes | Unfavorable |
| Summer, equatorial | 6:30pm-7:30pm | 45 minutes | Unfavorable |
| Winter, high latitude | 3pm-4pm | 2-3+ hours | Excellent |
| Winter, mid-latitude | 4:30pm-5:30pm | 1-1.5 hours | Good to excellent |
| Winter, equatorial | 5:30pm-6:30pm | 45 minutes | Moderate |
How much time for photos before sunset should you plan?
When preparing for a shoot, always check the exact sunset time for your location so you can set up without rushing. Arrive 30 to 45 minutes before the hour before sunset begins to scout your location and set up your equipment. This ensures you’re fully prepared when the golden hour light appears.
A typical outdoor session lasts about an hour, which gives you plenty of opportunities to experiment with different shots. The absolute best light, however—with its rich warm color—often peaks for just 15 minutes. Don’t pack up immediately after the sun goes down; continue shooting for a while to capture the incredible soft light that follows sunset.
Since light conditions change daily due to weather and the season, monitoring your schedule closely is essential. Many professional photographers scout locations in advance and use reliable apps to plan their sessions. With solid preparation, you’ll be perfectly positioned to capture the breathtaking beauty of golden hour.
Golden Hour Photography Tips for Stunning Results
Cars & Roses — Fine Art Photography
Landscape Photography — Fine Art
Breathtaking landscapes and motorsport photography — museum-quality archival prints.
Mastering golden hour photography requires a blend of technical skill and creative composition. By combining smart camera settings with strategic positioning, you can transform ordinary scenes into stunning visual art. These proven golden hour photography tips will help anyone capture this fleeting magic perfectly.
Best Camera Settings for Golden Hour Portraits and Landscapes
Your camera settings during this brief period should emphasize warm tones while maintaining image sharpness. Using a Cloudy white balance setting prevents your camera from neutralizing that classic warm color, making it one of the essential golden hour portrait tips to remember.
- Aperture selection: Try f/2.8 for portraits to create beautiful background blur, or f/14 for keeping landscapes and automotive shots thoroughly sharp.
- Shutter speed range: Use 1/250 to 1/500 to capture sufficient light without overexposing your frame. Gradually lower the speed as the light fades.
- Focus technique: Always focus on a person’s eyes or the closest headlight on a vehicle to ensure your main subject remains crisp.
- Smartphone optimization: Use portrait mode, tap to focus on your subject, and manually adjust exposure to achieve beautifully lit backlit images.
Proper camera settings work wonders for golden hour automotive photography. Accurate white balance and ISO adjustments prevent dark vehicles or unnatural metallic reflections from spoiling your photo. The warmth from a Cloudy setting makes any car’s finish shine beautifully.
How Golden Hour Elevates Automotive and Fine Art Photography
Photographing cars during the golden hour combines mechanical elegance with a captivating natural atmosphere. The low-angle sunlight emphasizes sleek curves and body lines in ways that harsh midday sun simply cannot match. Professional photographers recognize this golden hour light as the key to transforming standard photos into artistic masterpieces.
Working with natural light allows you to capture authentic colors without artificial flash fill. The exceptionally soft light reveals intricate details—from polished chrome to custom wheels—turning straightforward images into deeply dimensional and emotionally resonant works of art.
Practical Techniques to Make the Most of the Light
Position subjects facing away from the sun to prevent squinting and harsh shadows. Using carefully placed backlight adds warmth while perfectly separating your subject from the background. This technique creates a stunning rim light effect that adds incredible depth and dimension to your photographs.
Place vehicles in sidelight to cast long, dramatic shadows that accentuate their sleek contours. The morning golden hour right after sunrise provides softer contrast compared to the evening. In fact, the hour after sunrise offers remarkably even and exceptionally flattering illumination.
Try positioning subjects directly between your lens and the sun to capture striking silhouettes. This approach produces dramatic, defined shapes against the radiant golden hour light. Shooting early in the morning ensures breathtaking results that will enhance any photography portfolio.
Frequently Asked Questions
When should golden hour photos be taken?
The golden hour occurs approximately for the hour after sunrise and the hour before sunset. To pinpoint the exact window for your specific location and time of year, use a photography app like PhotoPills. Keep in mind that the absolute best sunlight, often called “magic hour,” typically lasts only about 15 minutes, so it’s crucial to arrive early and get set up beforehand.
Is 2 hours before sunset good for photos?
Shooting two hours before sunset is generally too early for ideal golden hour photography, particularly in the summer. At this time, the sunlight is still fairly high and bright, casting harsh, unflattering shadows that are not ideal for portraits. However, this time slot can be more workable during the winter, as the sun’s lower angle in the afternoon provides much softer light.
What camera settings work best for golden hour portraits?
For stunning golden hour portraits, start with these settings: set your white balance to Cloudy, keep your ISO low at 100, and use a wide aperture like f/2.8 to let in plenty of light. A fast shutter speed is effective early on, but as the light begins to fade closer to sunset, you’ll need to gradually increase your ISO to maintain a sharp image and avoid blur.
Try placing your subject so they are not looking directly into the setting or rising sun to prevent squinting. This position allows the warm sunlight to create a gorgeous rim light around them, which adds stunning depth and a beautiful, three-dimensional quality to your golden hour photography.
Cars & Roses
Discover Our Collections
Landscape
Landscapes
Fine Art Prints
Automotive
Sports Cars
Fine Art Prints
Prestige
Porsche Collection
Fine Art Prints
Museum-quality archival prints — from €78 — worldwide shipping
Sorry, the comment form is closed at this time.