 undefined
Read also: Black & White Photography Decor — Choose the right print size — Discover our prints
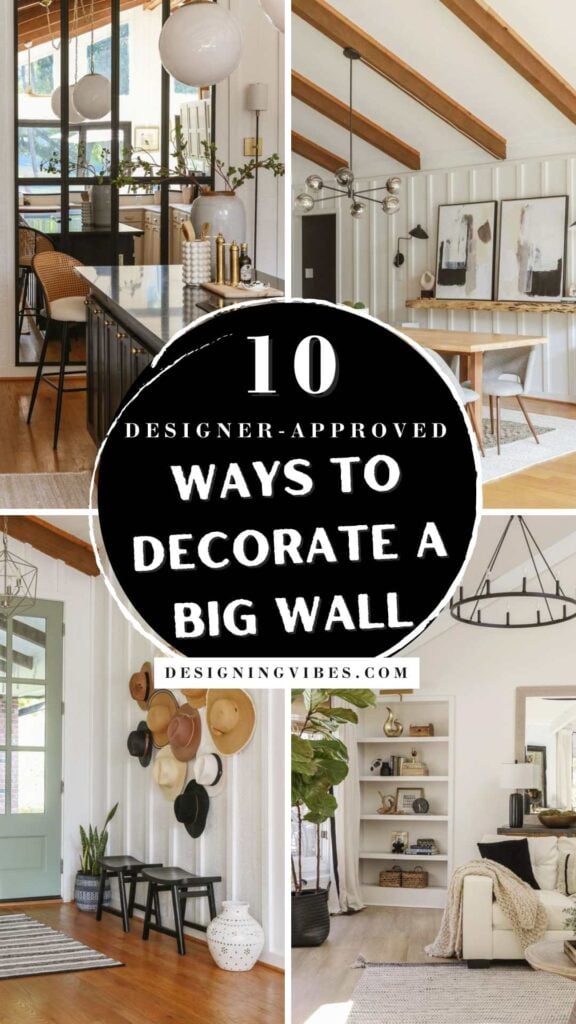
Explore gallery wall layout ideas for every style and space. From grid to organic arrangements, find the perfect gallery wall layout ideas with sizes, tips & inspiration.
undefinedRead also: Black & White Photography Decor — Choose the right print size — Discover our prints